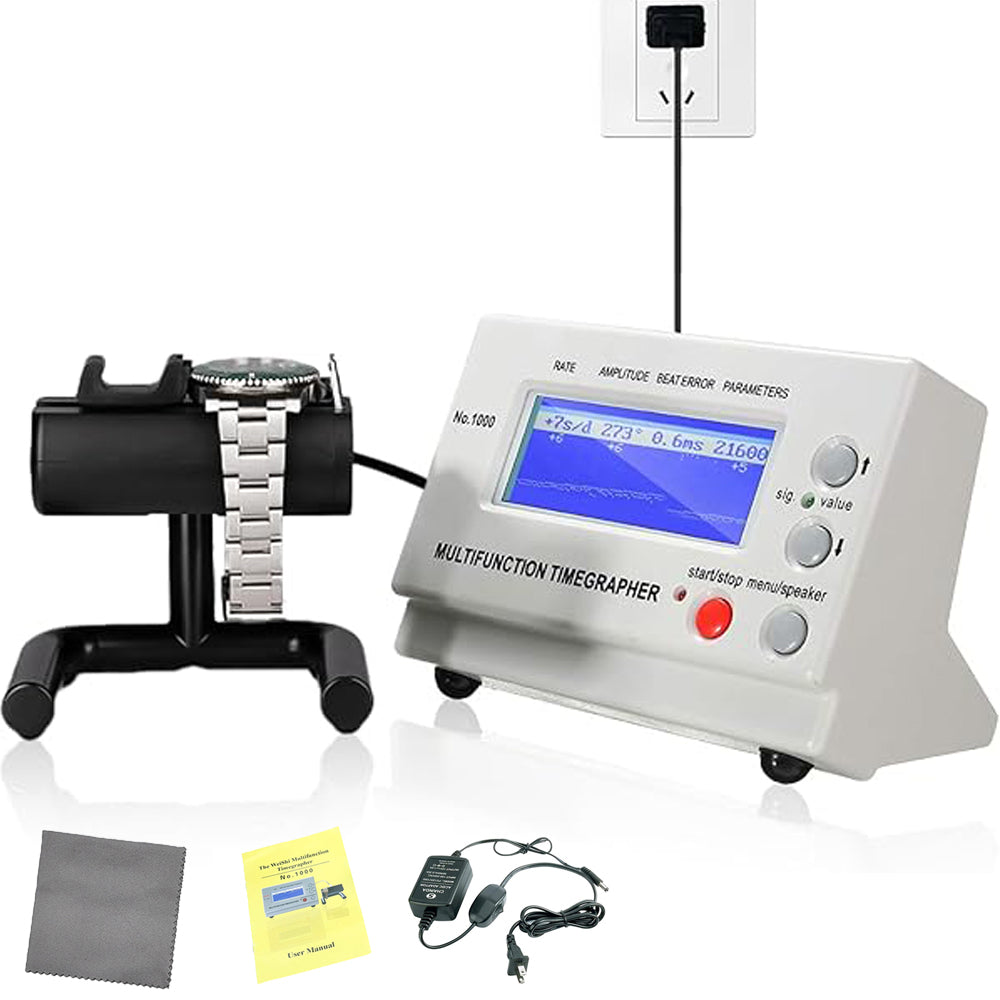
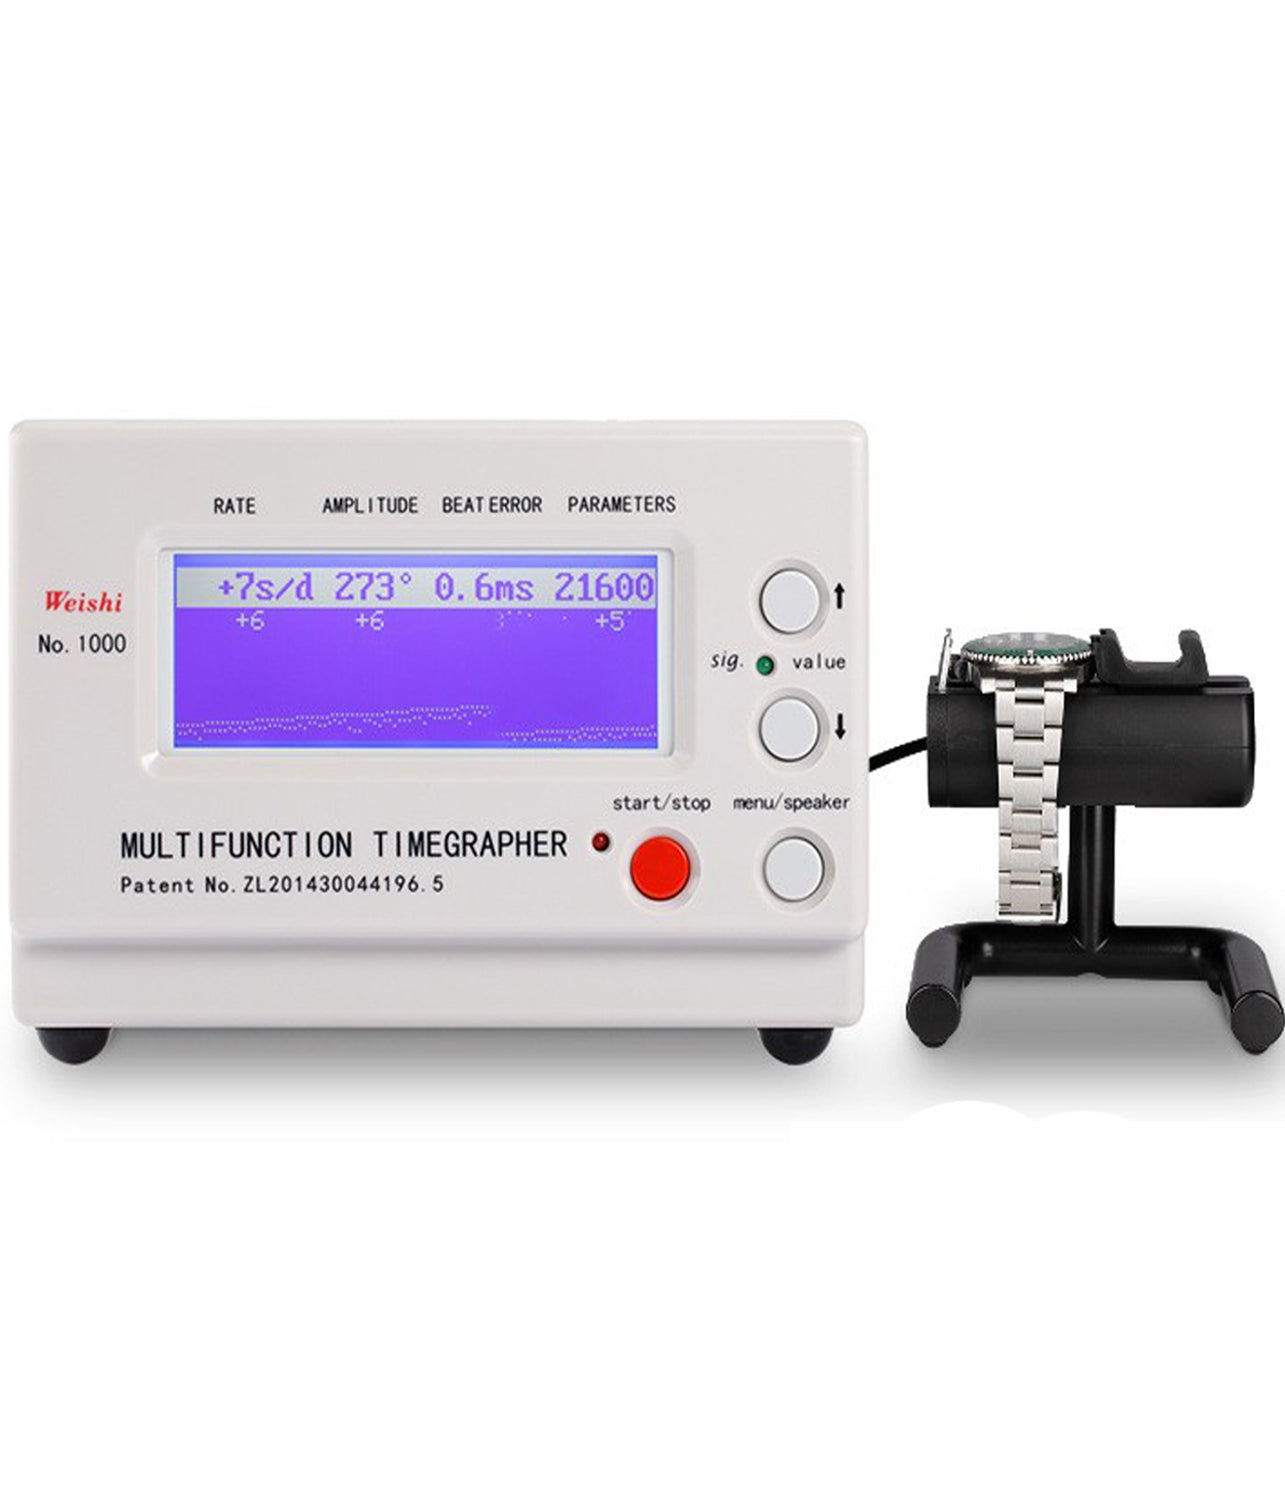
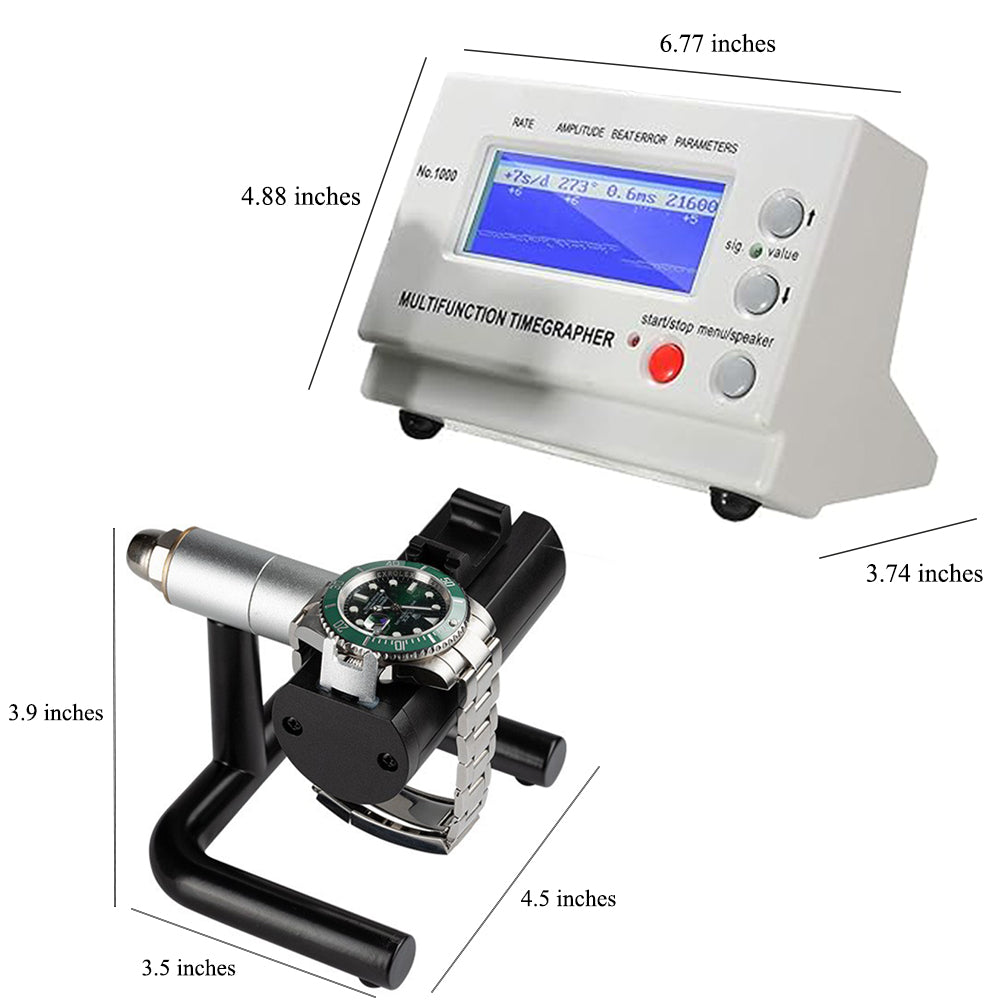
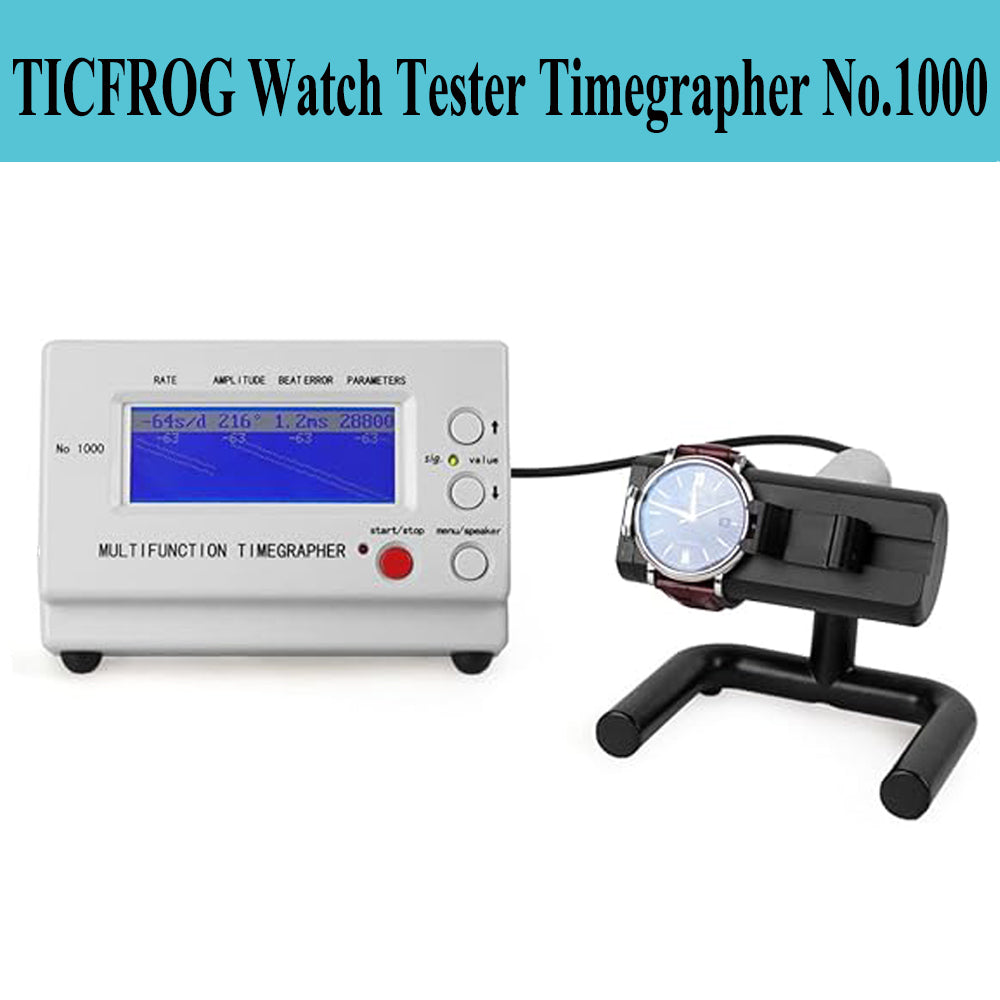
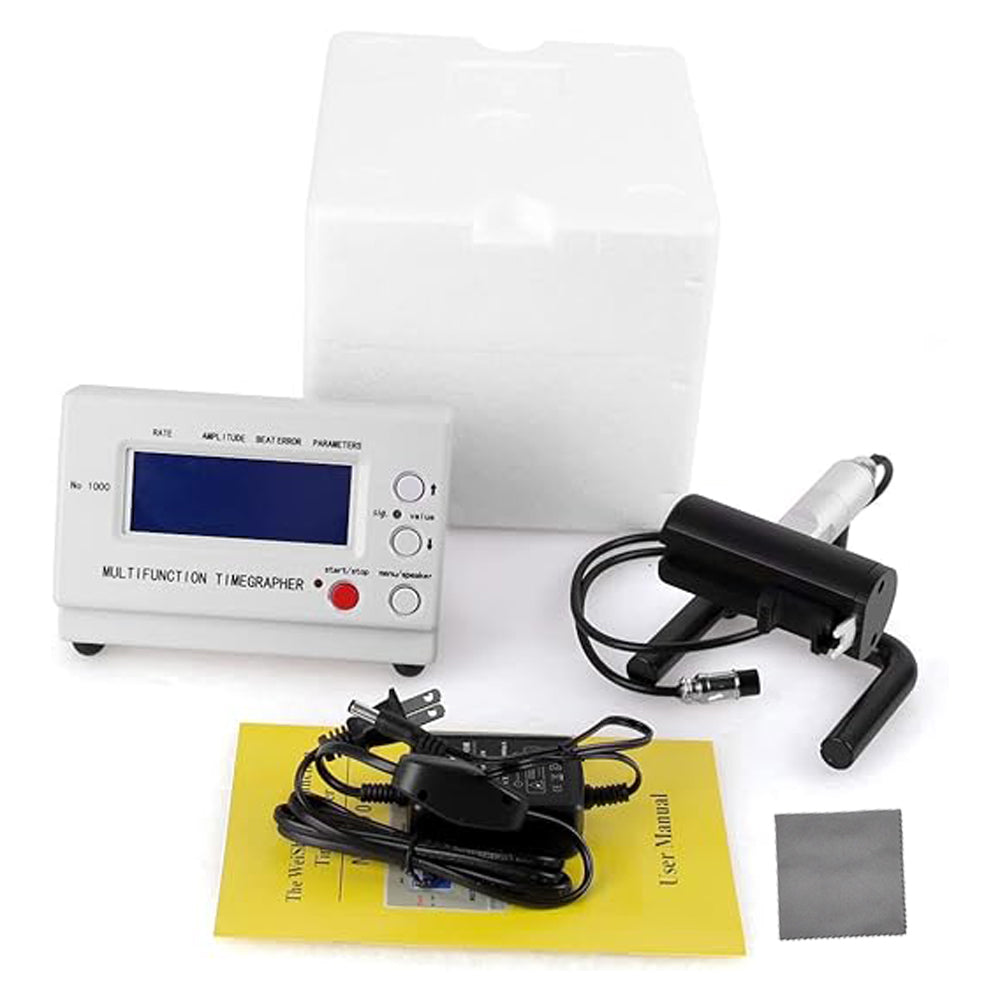
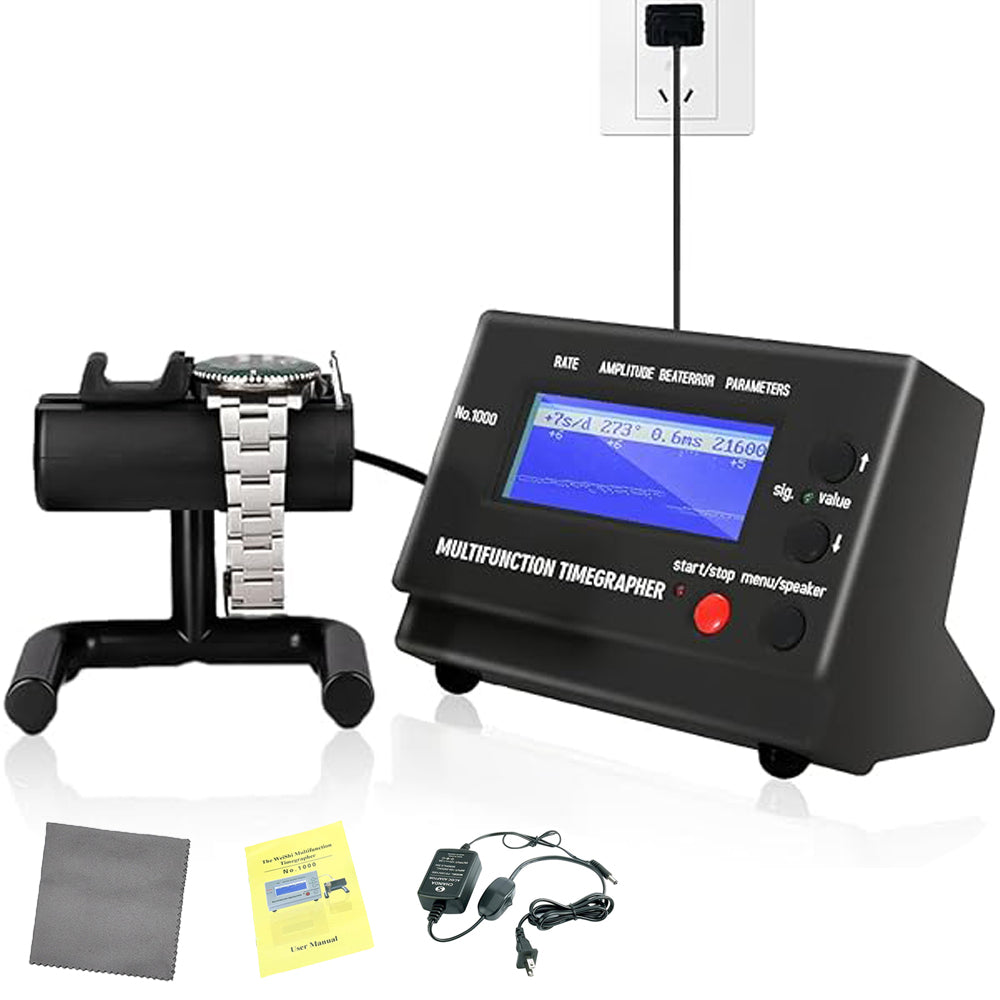
Watch Timegrapher No.1000 Weishi Multifunctional Watch Tester
Watch Timegrapher No.1000 Weishi Multifunctional Watch Tester
Couldn't load pickup availability

- No.1000 watch timegrapher is a precise mechanical watches tester.
- LCD screen shows the live digits of rate, amplitude, beat error,beat and lift angel.
- A timegrapher will be a great addition to your watchmaking desk and a useful tool to determine how well your watches are running.
- It’s a very worthwhile watch calibration tool for amateur watchmakers, watch manufacturers and watch technician.
- TICFROG CUSTOMER SERVICE - All TICFROG products carry a full satisfaction guarantee within the 18 months of purchase. If for any reason you are unsatisfied , you can contact us directly, we'll respond within 24hrs. Customer satisfaction is our top priority and we aim to make every TICFROG customer a customer for life.

Our watch timegrapher 1000 is equipped with all the essential functions needed to analyze a watch’s accuracy and is enough for beginners. It measures the critical parameters such as beat rate, beat error and amplitude, displaying results both graphically and numerically. The timegrapher 1000 is a great option for novice watchmaker’s just getting to grips with timegraphers and watch accuracy.
What is the difference between ticfrog timegrapher 1000 and 1900?
- Screen Size: The 1900 model has the larger screen.
- Resolution: The resolution is drastically different between the 1000 and 1900.
- Screen Color: The 1000 model has a monochrome screen whereas the 1900 model has a color screen.
- On ticfrog 1900 the two traces appear in yellow and light blue to discriminate entrance and exit pings for easier beat error adjustment. For fault resolution it is essential to be able to identify which trace is the entrance and which is the exit which is impossible with ticfrog 1000 timegrapher.

Product performance and specifications
- Measuring possibilities: Rate deviation, amplitude, beat error.
- Rate deviation measurement: the range of deviation is± 999 sec / day, precision 1.0 sec/day.
- Amplitude measurement: Numerical display in degrees, resolution is1°.
- Measuring range:100° to 360° (the lift angle can affect the amplitude, range: 30°to 70°.Under normal circumstances, the amplitude value do not exceed 330°.).
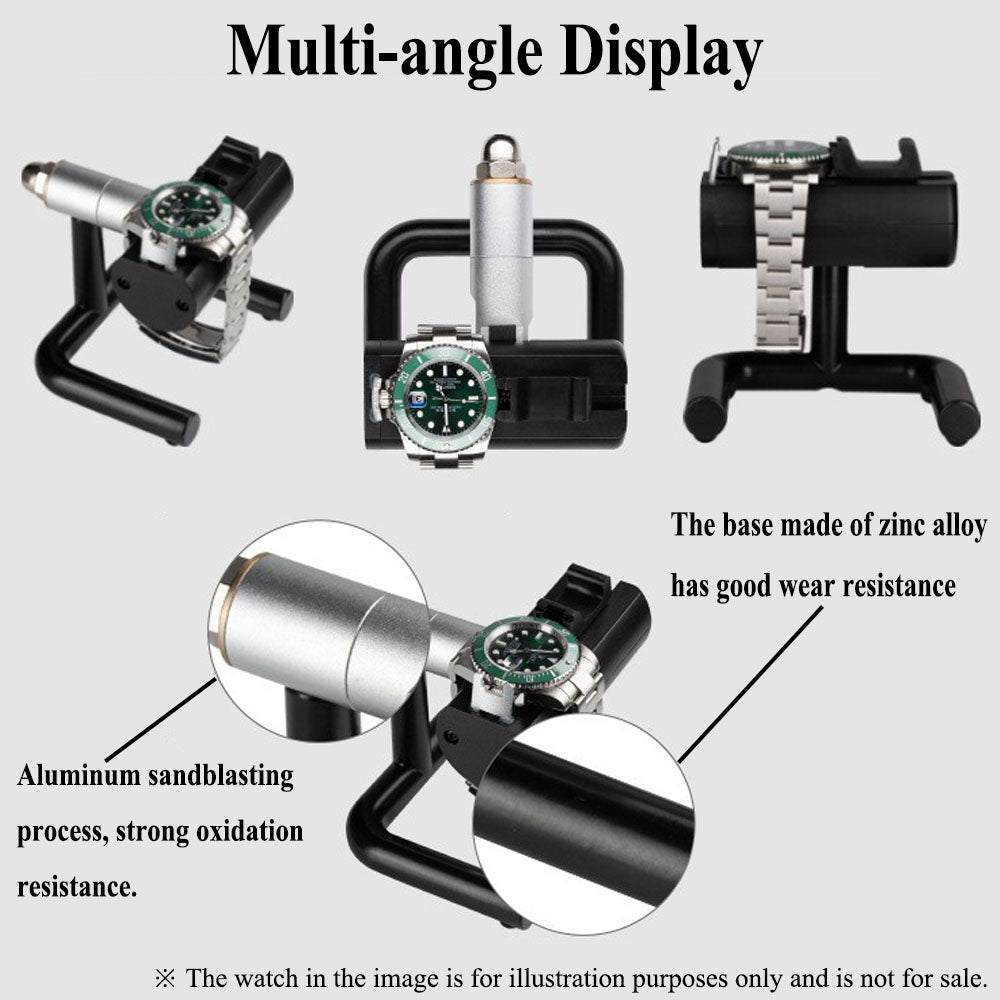
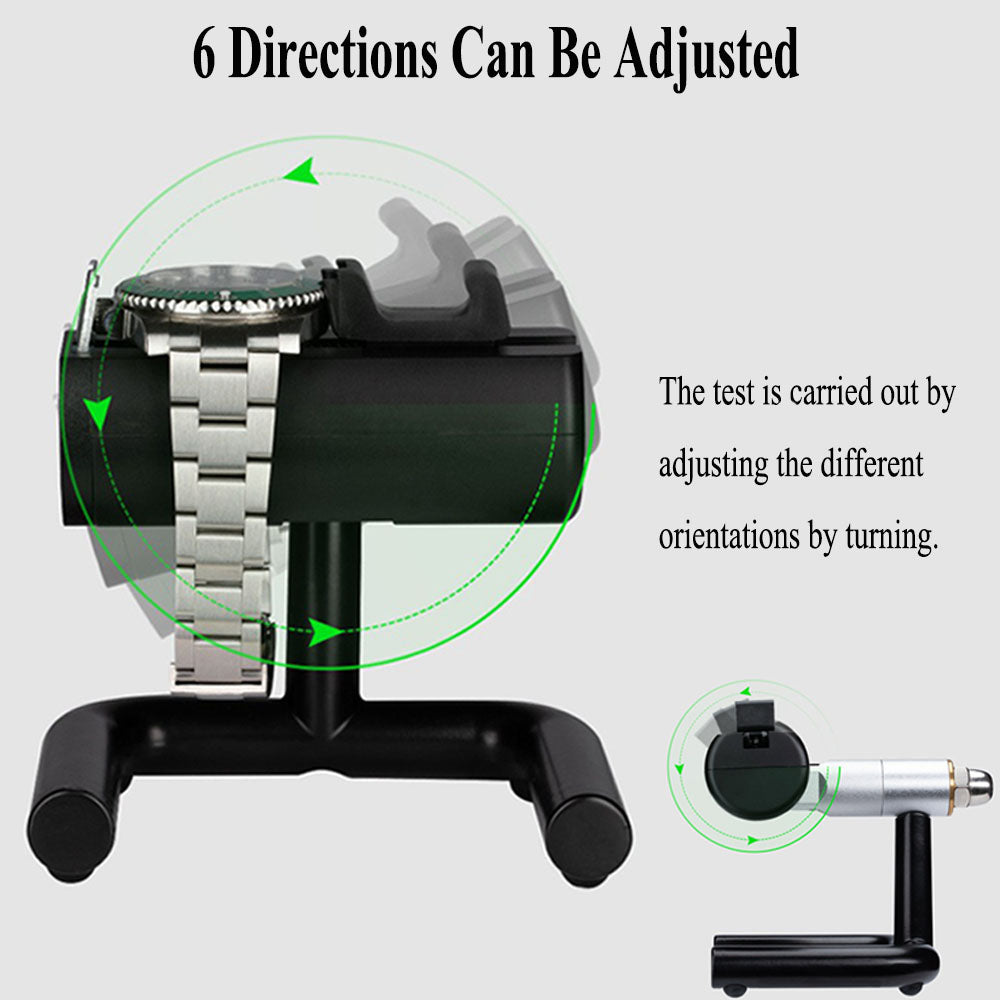
- Measuring position: 1 to 6 positions.
- Supply voltage: single-phase AC 100 V~240V ± 10% two-line.
- Working environment: 0 ℃ to 50 ℃, relative humidity: 0 to 80% RH.

Warm notice about watch timegrapher 1000
- Only for ordinary mechanical watch,quartz movement watches are not supported. For high-end watches (e.g. Omega Co-Axial 2500/8500), it is necessary to input movement information manually, so it is recommended to choose advanced models for testing. Besides, please make sure the watch swing angle is 220°~320°.
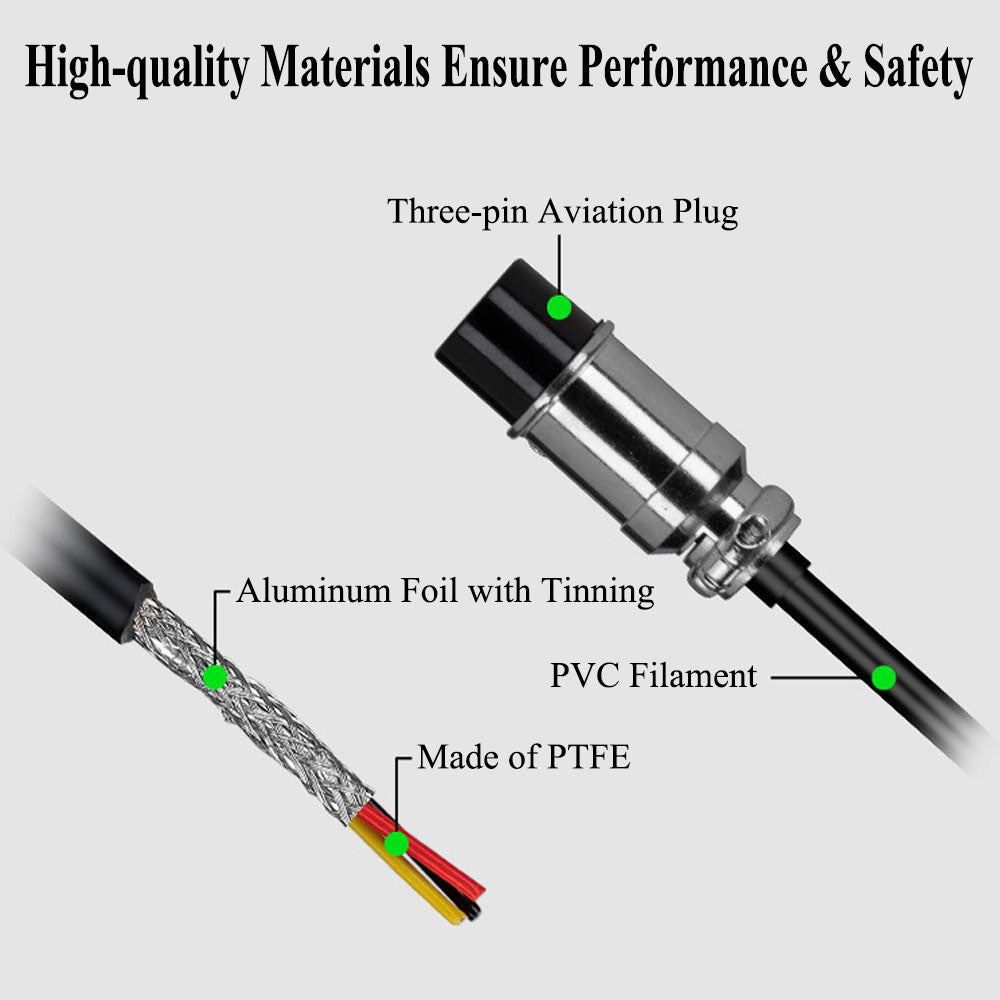
- The design of the pickup is very delicate, it is extremely sensitive to sound and electromagnetic radiation. Keep away from external interference during test, such as, mobile phones and chargers, TVs, stereos, computers and other sources of high radiation or noise.
- It takes time to respond if multiple watches are exchanged and tested, we suggest to shut down and restart in this case.
- If you accidentally pressed the red pause/start button, please press the red button again when you use it, or it will not work.

Frequently asked questions
Q1: Why the screen is dark or no display?
--Make sure the power indicator light is on. If not, check the power adapter and cable connections.
Q2: Why the equipment cannot work normally?
--Make sure the instrument is correctly placed, avoiding direct sunlight and extreme temperature environments, also could try to restart the device.
Q3: Why are there scattered or irregular curves?
--Make sure your watch is placed stably on the test position. Adjust the beat frequency setting to ensure it matches the watch under test. Adjust the sensor input gain to minimize noise interference.
Q4: Why do measurement data anomalies such as rate, amplitude, and beat error occur?
--Check if your watch is in normal motion, dry lubricant or damaged internal parts may cause abnormalities. Recalibrate the parameter settings according to the specific model, such as the angle of lift (default 52°), measurement period (2 seconds to 60 seconds), etc.